Free Passport Photo Editor Online: Crop, Background, Head Size, and Print Exports (2026)
Use a free passport photo editor online for crop, background cleanup, head-size review, phone photos, 600 x 600 pixel exports, and print-ready 4x6 sheets without signup or watermark.
Free passport photo editor online: what it should actually do
A free passport photo editor online should help you turn a normal phone portrait into a document-photo file or sheet. That means crop, background, head size, and export work in one place. It does not mean beauty filters, face reshaping, or a vague square crop that leaves you guessing at the end.
If you only need the short answer, a free passport photo editor online should let you crop the document frame, check head size, clean the background, and export a file or print sheet without retouching your appearance. That is the real line between a document editor and a normal photo app.
If you came here to edit passport photo online, start with the narrow job first: choose the document size, put the head in the correct part of the frame, keep the background plain, and export the right file or print sheet. The best editor is the one that makes those checks obvious before download, especially when you are working from a phone photo.
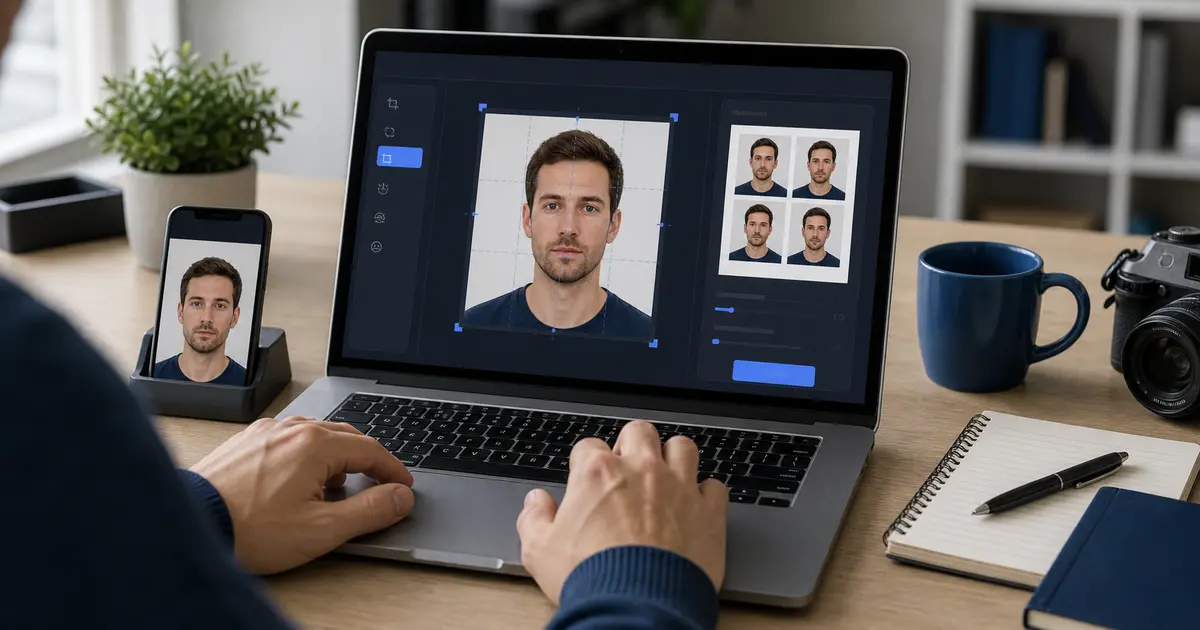
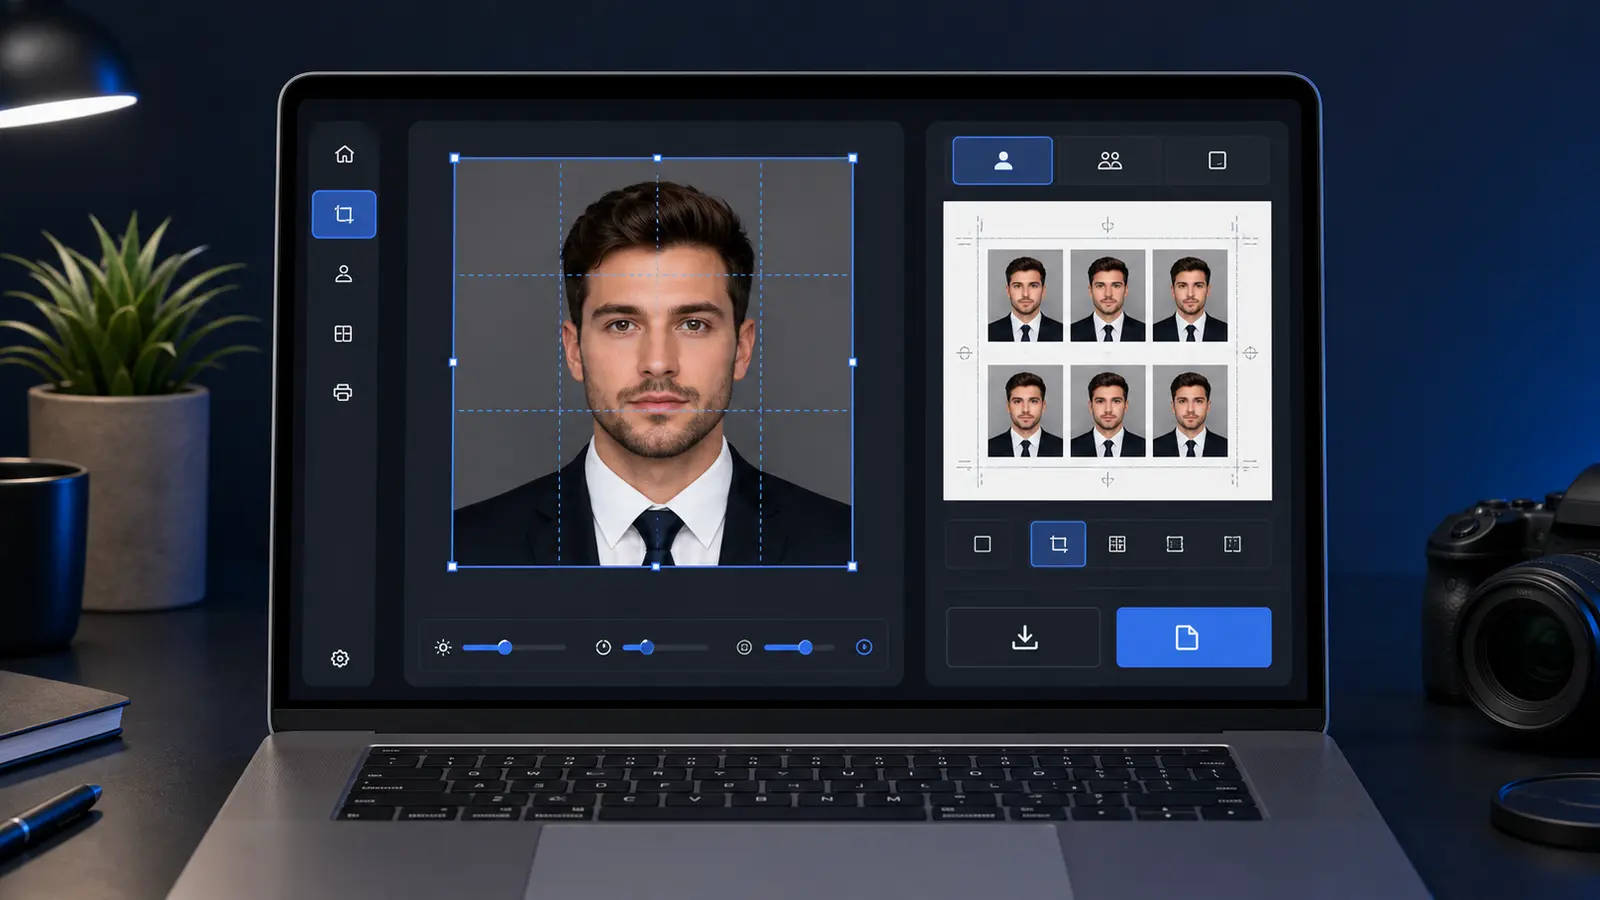
Passlens is built around that browser-first workflow: open the passport photo maker, pick a verified preset, adjust the crop, review the background, and export a single file or a 4x6 print sheet. No signup, no watermark, and the core editor keeps the work local by default.
Why a normal photo editor is the wrong tool for this job
A normal image editor can crop, brighten, rotate, and export. That sounds enough until you need the photo to measure correctly. Passport and ID photos are not judged like social images. A file can look clean on screen and still fail because the head is too low, the background has a shadow, the face was retouched, or the final print scaled down inside a photo-lab layout.
That is the gap behind searches like passport photo editor online, passport size photo editor, and photo editor for passport photo. People are not asking for more effects. They are asking for fewer places to make a sizing mistake.
| What you need | Generic editor problem | Passport editor expectation |
|---|---|---|
| Measured crop | A square crop may look right but ignore the required document size. | The crop should be tied to a preset such as 2 x 2 in, 35 x 45 mm, 50 x 70 mm, or another route. |
| Head-size review | Most editors do not care whether the head fills the right part of the frame. | The preview should make head height and face position easy to check. |
| Plain background | Background tools often create halos, hard edges, or design effects. | The result should stay natural and document-like, not stylized. |
| Digital export | The export screen may hide pixels, compression, and file type. | The editor should make upload-ready file choices easy to review. |
| Print layout | A single tiny image is awkward to print at a pharmacy or home printer. | The editor should generate a normal sheet such as 4x6, A4, or Letter when printing is the goal. |
Can you edit passport photos online?
Yes, but only in the document-preparation sense. Safe edits usually mean crop, rotate, size, background cleanup, format conversion, compression, and print layout. Unsafe edits are the ones that change how the person looks. For online renewal, the plain rule is: do not retouch your appearance.
The U.S. passport renewal guidance warns against filters and retouching tools that change appearance. GOV.UK gives the same kind of instruction for UK passport photos: use a clear color photo, no effects, no filters, and do not correct the image like a portrait retouch. The language varies by country, but the practical standard is stable. Prepare the file. Do not remake the person.
| Editing task | Use it? | Reason |
|---|---|---|
| Crop to the document frame | Yes | The output has to match the route, not the camera frame. |
| Straighten a slight tilt | Usually | Small rotation can fix framing, but heavy perspective changes can look unnatural. |
| Clean a background edge | Usually | Plain backgrounds are common, but obvious cutouts and halos can make the image look edited. |
| Convert HEIC to JPEG or PNG | Yes | Many upload flows and print workflows are easier with predictable formats. |
| Create a print sheet | Yes | A sheet layout changes placement, not the person in the photo. |
| Smooth skin, reshape the face, whiten eyes, remove facial marks, or use beauty filters | No | That changes appearance and can create rejection risk. |
Retake beats repair
If the source photo is blurry, shadowed, heavily filtered, or shot from the wrong angle, take a new photo. A better original almost always beats aggressive editing.
State Department photo tool vs a full online passport photo editor
The State Department photo tool is useful, but it is not a full editor. The visa digital image page describes the tool as a way to select an image, resize or rotate it, crop it to exactly 600 x 600 pixels, and save it. The same page warns that the tool is intended for cropping only and does not decide final acceptance.
That distinction matters. A crop tool can put a photo into a square. A full browser editor has to help with the steps around that square: choosing the right preset, checking head size, reviewing background cleanup, building a print layout, and keeping the export understandable. If you need a U.S. visa-style digital image, 600 x 600 pixels can be relevant. If you need a printed passport photo, the 2 x 2 inch physical size and the print workflow matter more.
Passlens should not be treated as an issuing authority or as a guarantee. It is a preparation tool. Use official pages for the rule, then use the editor to make the image easier to crop, measure, print, and review.
Which editor route fits your situation?
There are four common routes: an official crop tool, a browser editor, a mobile app, or a retail/photo-booth service. They overlap, but they do not solve the same problem. Picking the wrong route is how people end up with three almost-right files and no confidence in the one they should use.
| Route | Good fit | Watch out for |
|---|---|---|
| Official crop tool | You already have a clean photo and only need a specific digital crop. | It may not help with background quality, print sheets, phone formats, or route comparison. |
| Browser passport photo editor | You want a bigger review surface, preset choices, background checks, and digital or print export from one workflow. | It still needs a usable source photo and a final official-rule check. |
| Mobile app | You want fast capture and quick edits on the same device. | Some apps hide downloads behind accounts, watermarks, subscriptions, or unclear export settings. |
| Retail or booth service | You want someone else to handle capture and printing. | It may cost more, and you may not get a reusable digital workflow for later documents. |
The browser route is strongest when you care about the final review. A phone is good for capture. A larger browser screen is better for checking crop, background edges, file format, and print layout before you download. That is why many people take the photo on a phone, then finish in a web editor.
If you only need the official 600 x 600 visa crop and already have a perfect source photo, an official crop tool may be enough. If you need a print sheet, a different country size, background cleanup, or a no-signup workflow, a full online editor makes more sense.
How to edit a passport size photo without losing control
This is the workflow I would use for any passport size photo editor, whether the final route is passport, visa, driving licence, biometric photo, or a general photo ID. Keep it boring. Boring is good here.
- Pick the country and document route first. The phrase "passport size" is not enough because sizes differ by route.
- Start from a clear, recent photo with the person facing the camera. Good light and a plain wall save more time than any editor feature.
- Use measured crop controls, not a loose social-media crop.
- Check head size and face position before touching the background. If the face is too small, no background tool fixes that.
- Prepare the plain background only as far as the route needs. Avoid plastic-looking cutouts.
- Use background removal only when it improves a usable source photo, not as a rescue for a bad capture.
- Export the right target: a single digital file for upload, or 4x6, A4, or Letter print layout for paper.
- Before submitting or printing, compare the result with the official source and a checklist such as the passport photo validator guide.
That workflow covers most searches around how to edit passport photo, how to edit passport size photo, and edit picture for passport. It also keeps the risk in the right place. You are editing the document file, not the person.
What to compare before choosing a passport photo editor
A good editor should answer practical questions before asking for your money or your account. Can it create the size you need? Can it handle a phone upload? Can it show the crop clearly? Can it export the file without a watermark? Can it make a print sheet? Can you understand what happened to the image?
Those questions matter more than long feature lists. Passport-photo software is easy to overbuild and still miss the thing users actually need: a final result they can inspect and use. When a tool has fifty filters but no measured print layout, it is solving the wrong problem.
- Preset coverage: Look for country and document presets instead of a generic square crop.
- Manual control: Automation helps, but you should still be able to adjust the crop and review the result.
- Head-size cues: The editor should make it clear when the face is too small, too large, or badly positioned.
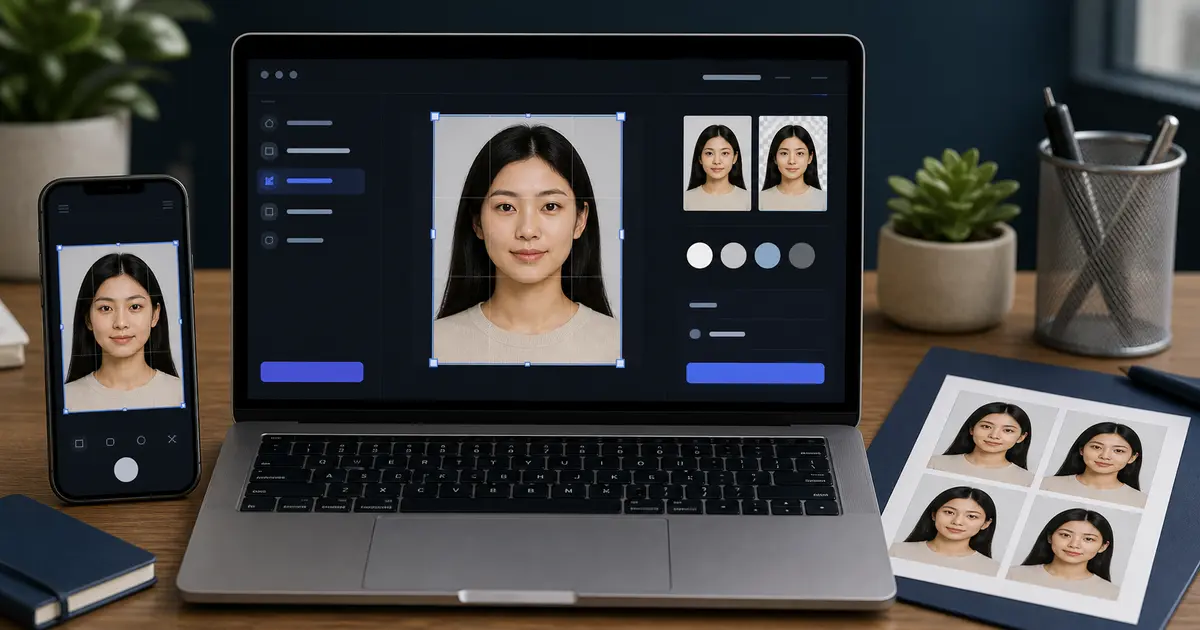
- Background review: The tool should let you inspect edges and shadows before export.
- Digital export: You should know the file type, pixel size, and whether compression changed the image.
- Print export: A serious editor should support normal sheet output such as 4x6, A4, or Letter.
- Download terms: Free should mean usable download, not a watermarked preview or a surprise account wall.
This is where Passlens has a clean product story. The editor can sit between the capture step and the final export step. It does not need to pretend to be the issuing authority. It needs to make the file-preparation work legible.
Phone photos, HEIC files, and browser exports
Most people now start with a phone photo. That is fine. Modern iPhone and Android cameras have enough resolution for document photos when the original is sharp and well lit. The friction is usually not the camera. It is the file path after capture.
Apple documents HEIF as a more efficient format than JPEG for iPhone capture. That is useful for everyday photos, but it can confuse users when a browser, upload portal, or print shop expects a predictable JPEG. A good online editor should accept common phone inputs and produce an output that is easy to understand. You should not have to research file formats just to print two ID photos.
For digital routes, use the passport photo pixels guide alongside the editor. Pixel size, file size, compression, and file type can matter as much as the visible crop. For print routes, use the passport photo size guide and keep the sheet at 100% scale.
Common failure modes an editor should help you catch
Most bad passport-photo edits fail quietly. The file looks acceptable at a glance, but one small detail is off. The head sits too low. The shoulders are cropped too tightly. The background edge has a pale halo. The file is technically 600 x 600 pixels but has been compressed until the face looks soft. The sheet prints smaller because the printer dialog used fit-to-page.
A useful editor should make these problems easier to catch before download. It should not reward speed over review. Fast matters, but the last thirty seconds of checking are where many avoidable mistakes get caught.
| Problem | What it looks like | Better fix |
|---|---|---|
| Face too small | Too much wall or shirt; the head feels distant. | Retake closer or use a crop with enough original resolution. |
| Face too large | Hair, chin, or shoulders are close to the frame edges. | Back up in the crop and check the route size again. |
| Background halo | A bright rim appears around hair, ears, or collar. | Use a better source background or reduce aggressive cleanup. |
| Soft export | The preview looks fine, but the downloaded file looks compressed. | Use a higher-quality export and avoid repeated re-saving. |
| Wrong print scale | A 2 x 2 photo measures smaller after printing. | Use a prepared sheet and print at 100% actual size. |
These are workflow problems, not character flaws. The fix is to build the checks into the editor path so the user does not have to remember every trap from scratch.
Background editing should be boring and easy to inspect
Background cleanup is one reason people search for the best passport photo editor online. It is also where weak tools overpromise. A passport photo background is not a creative backdrop. It should look plain, even, and natural. The edge around hair, ears, collars, and shoulders should not look pasted on.
The safest editor design is not a magic button with no review. It is a tool that lets you inspect the result. Zoom in. Check the collar. Check flyaway hair. Check whether one side of the background is darker than the other. If a cleanup result looks fake, retake the photo against a better wall instead of stacking more edits.
This is where a browser workflow helps. You can start on your phone, then review the image on a larger screen before printing. For users comparing a browser editor against a native app, that larger final review can matter more than the first thirty seconds of capture.
Print export is where many online editors fall apart
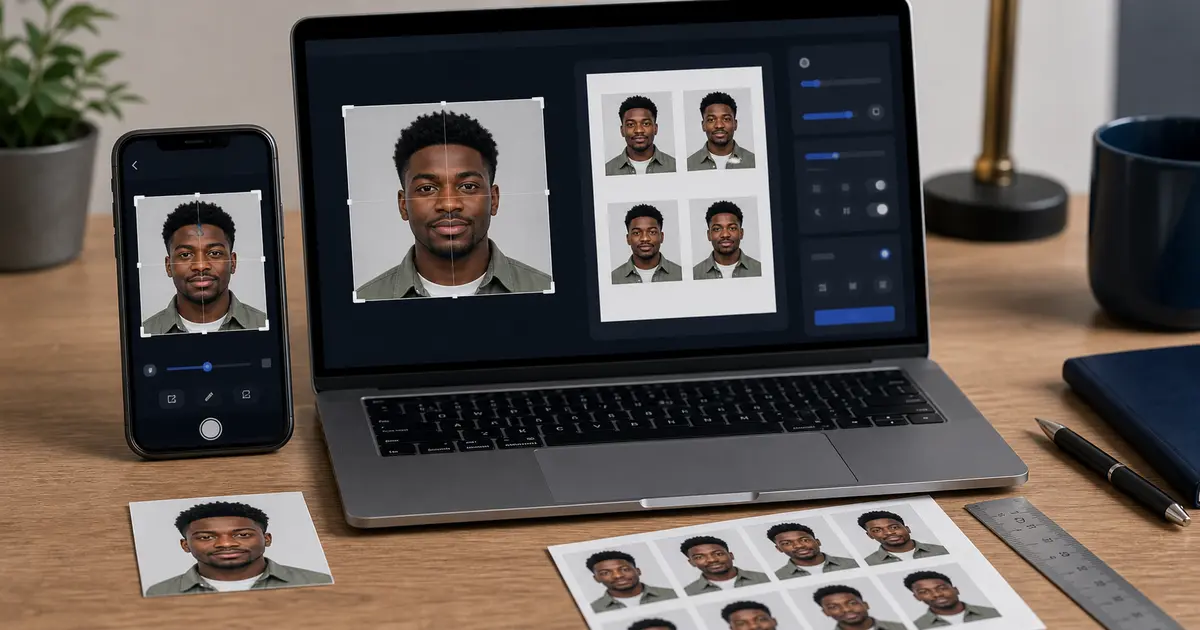
A lot of tools stop after creating a single passport-size image. That is fine for a digital upload, but awkward for paper. If you upload a tiny 2 x 2 image directly to a retail printer, the lab may place it on a larger sheet in a way you did not expect. A prepared 4x6 print sheet is easier to send to a pharmacy, kiosk, or home printer because it behaves like a normal photo print.
Good print export gives you the sheet size, the number of copies, cut marks if needed, and a reminder to print at actual size. That is why Passlens links the editor to passport photo print layouts instead of treating printing as an afterthought.
- Use 4x6 when you want a cheap pharmacy print or a compact home-print route.
- Use A4 or Letter when you need more copies or want a larger sheet with easier cutting space.
- Use 300/600 DPI exports when you need the printed result to measure correctly at 100% scale.
- Do not use fit-to-page unless the printer workflow is explicitly designed for it.
No signup, no watermark, and privacy are not side details
Competitor pages in this space often lead with "free", "no account", "no watermark", "browser", and "print-ready". That is not random wording. Users have learned that many passport-photo sites let them upload and edit, then hide the useful download behind a paywall, watermark, or account prompt.
For Passlens, the promise should stay plain: no signup, no watermark, and browser-first editing for the core workflow. If a feature ever requires upload-based processing, the user should choose it knowingly. Hidden processing choices erode trust fast because the photo is a document-style portrait, not an ordinary selfie.
The strongest online passport photo editor is the one that makes the next step clear: what stays local, what changes in the image, which export you are downloading, and what you still need to verify against the official route.
Checklist before you download or print
The last review should feel slow compared with the rest of the workflow. That is normal. A passport photo editor can prepare the file, but it cannot know every submission route you might use next. Some routes want a digital upload. Some want a printed sheet. Some let you bring a pharmacy print. Some ask for a photo taken by a photographer. The editor is where you make the output clean enough to inspect, then the official route tells you whether that output is acceptable.
- The selected preset matches the exact country and document route.
- The head is not too small, too large, too high, or too low in the frame.
- The face is looking straight at the camera, with a natural expression and both eyes visible.
- The background is plain and does not show shadows, texture, lines, objects, or obvious cutout edges.
- The image has not been filtered, beautified, reshaped, or retouched.
- The file format and pixels match the upload route, or the sheet size matches the print route.
- The print export uses a normal sheet such as 4x6, A4, or Letter and will be printed at actual size.
- The final result is checked against the issuing authority after you review the editor preview.
If that checklist sounds more serious than a normal crop, that is the point. Passport and ID photos are simple only when the workflow is specific. The more generic the editor, the more work falls back onto you.
For repeat use, save the habit rather than the guesswork. Start with a clean phone photo, open the same browser workflow, choose the preset, check the head, review the background, choose digital or print export, and verify against the official route. Once that loop is familiar, making a second document photo is much less stressful.
Sources and related Passlens tools
- Apple Support - Use HEIF or JPEG on iPhone camera
- U.S. Department of State - Passport photos
- U.S. Department of State - Uploading a digital photo
- U.S. Department of State - Digital image requirements
- GOV.UK - Photos for passports
- Passlens - Passport photo maker
- Passlens - Passport photo crop tool
- Passlens - Passport photo background removal
- Passlens - Passport photo print layouts
- Passlens - Passport photo software guide
- Passlens - Passport photo app guide
- Passlens - ID photo maker online guide